Enhancing Your Embroidery with Creative Quilting Techniques
Explore creative quilting techniques to elevate your embroidery projects and learn how to incorporate free designs from various sources for stunning results.
Unleashing Creativity with Quilting Techniques for Embroidery Machines
 Welcome to the wonderful world of embroidery! If you’re here, you likely share a passion for crafting beautiful designs and bringing fabrics to life with your embroidery machine. But did you know that incorporating quilting techniques into your embroidery can open up a whole new realm of creativity? In this article, we’re going to explore some exciting tips and tricks to enhance your embroidery projects using quilting techniques, along with some free designs to get you started!
 The Quirky Intersection of Embroidery and Quilting
Embroidery and quilting are two beloved crafts that, when combined, can create extraordinary textile art. Many embroidery enthusiasts may not realize how much quilting can enrich their projects. Quilting involves stitching together multiple layers of fabric, and when you incorporate those classic techniques into your embroidery work, the results can be breathtaking. Whether you’re a total embroidery newbie or a seasoned pro, these tips will help you merge these two crafts seamlessly!Tip 1: Layering for Dimension
One of the simplest yet most impactful quilting techniques is layering. By placing different fabrics beneath your embroidery, you create dimensional designs that pop! Here’s a quick guide on how to do it:1. Choose Your Fabrics: Start with a base layer like cotton, then choose contrasting fabrics in various textures and colors.
2. Stabilize: Always use a stabilizer to support your embroidery and prevent puckering.
3. Layering: Place your second fabric piece underneath the first layer before hooping, allowing your machine to stitch through both layers.
4. Play with Colors: Let your creativity shine by choosing fabrics that harmonize with or contrast your embroidery thread colors.
Tip 2: Quilting Stitches Show Off Embroidery Designs
Quilting stitches can be used to enhance your embroidery design. Consider the following methods:- Echo Quilting: This technique involves stitching parallel to the edges of your embroidery design, creating a beautiful frame around your work.
- Free-Motion Quilting: If you’re feeling adventurous, try your hand at free-motion quilting! This gives you the freedom to draw whimsical lines and shapes around your embroidery.
Experiment with different styles and placements to see what best highlights your design. The juxtaposition of quilting lines against intricate embroidery can create stunning visual effects.
Tip 3: Incorporating Free Designs
Finding free designs online is an exciting treasure hunt! There are many websites where talented designers share their creations, so you can easily find artwork that inspires you. Here are a few places to check out:- Embroidery Design Websites: Many websites host a variety of free embroidery designs. Sites like EmbroideryDesigns.com and Urban Threads often release free designs or special promotions.
- Social Media Groups: Join Facebook groups or communities centered around embroidery – they frequently share free patterns!
- YouTube Tutorials: Many embroiderers share their designs on YouTube along with tutorials on how to use them. You can pick up great tips while getting a unique design!
Once you find a design you love, you can incorporate it into your quilted embroidery projects! Think about how layering fabrics with contrasting colors can bring out the details of the design even more.
Tip 4: Create Your Own Designs
Feeling adventurous? Why not try creating your own unique designs? With software like Embrilliance or Stitch Era, you can digitize your drawings or even design simple patterns. Simple shapes combined can lead to beautiful embroidery designs!### Here’s how you can embark on your design journey:
1. Sketch Your Ideas: Grab a sketchpad and doodle some designs that you envision.
2. Use Design Software: Learn the basics of embroidery design software. There are many tutorials available specifically for beginners!
3. Test Your Designs: Once you digitize your work, test it out on various fabrics.
Creating custom designs is not only fun, but it also adds a personal touch to your projects that will be cherished for years to come!
Quilting-Embroidery Projects to Try
Now that you’re armed with tips and tricks to integrate quilting techniques into your embroidery, let’s explore some fun projects to get your creativity flowing!- Quilted Pillows: Create a stunning combination of embroidery designs on a quilted pillow cover. Use different fabric layers to create a unique statement piece for your home.
- Mixed Media Wall Hangings: Combine fabric scraps and embroidery designs into a wall hanging. Add some quilted motifs to give it depth and texture!
- Giftable Quilted Tote Bags: Perfect for your crafty friends! Customize tote bags with embroidered designs and quilted patches for a special touch.
- Fabric Book Covers: Make unique fabric book covers embroidered with inspiring designs. Quilted elements can add extra durability.
Wrapping Up
Embroidery allows us to express our creativity, and when you mix it with quilting techniques, the possibilities are endless! Try layering fabrics, utilizing free designs, and even creating your own patterns. Don’t be afraid to experiment, as the beauty of crafting lies in finding what works best for you.So gather your supplies, unleash your creativity, and let the world of embroidery and quilting collide in the most delightful way! Happy stitching!
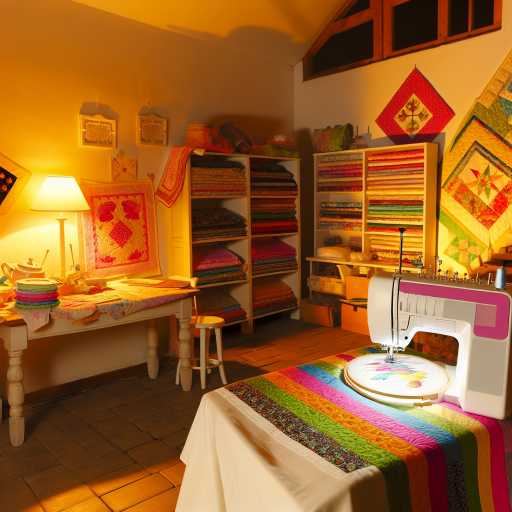
Image Ideas for Your Projects: If you’re looking for visual inspiration, picture a cozy craft room filled with vibrant fabrics, an embroidery machine in action, and stunning quilted pieces on display. Consider a warm, inviting atmosphere that beckons creativity!
Final Thoughts: Remember, the journey of embroidery and quilting is as joyful as the finished product. So have fun, and let your creativity shine!
Unlocking Creativity with Free Embroidery Designs and Tips
Explore unique tips and free designs for your embroidery machine to unleash your creativity and enjoy this rewarding hobby.
Enhancing Your Embroidery with Creative Quilting Techniques
Explore creative quilting techniques to elevate your embroidery projects and learn how to incorporate free designs from various sources for stunning results.
Unlocking Embroidery Magic: Tips for Beginners in Buenos Aires
Discover essential embroidery machine tips and free designs perfect for beginners in Buenos Aires, enhancing your creative journey in embroidery.